The Sawyer Squeeze has been the default backcountry filter for a decade because it is almost impossible to get wrong in principle: water goes in one end, through a 0.1 micron hollow-fiber membrane, and out the other. What people do get wrong is the maintenance, and a neglected Squeeze goes from a comfortable squeeze to a two-handed struggle inside a week of silty water.
Everything below comes from Sawyer's own product page and help centre, both linked at the bottom. Where Sawyer states a rule — the freezing policy in particular — it is quoted rather than paraphrased.
What is in the box
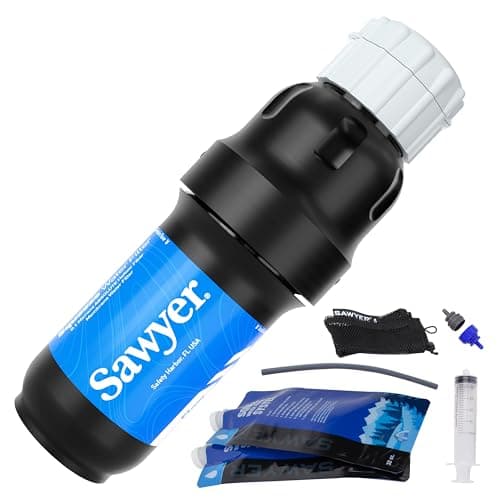
The full Squeeze kit (SP129CL) ships with the filter, two collapsible pouches, a cleaning plunger, a cleaning coupling, gravity tubing, inline hydration-pack adapters and a mesh bag. The filter itself is 85 g (3.0 oz) — Sawyer's own “approx. 3 ounces” — and it has a removable flip-top cap. The weight field on Sawyer's page reads 8.19 oz and does not say what that covers, so the figure we use everywhere on this site is the filter alone.
The important part is the thread: standard 28 mm, which is the thread on a disposable water bottle. That one detail is why the Squeeze works everywhere, and why most people quietly abandon the pouches in favor of a plastic bottle from a gas station.
Before the first use
- Flush it at home. Run clean water through the filter for a few seconds to wet the fibers and clear any manufacturing residue. Expect the first pull to be slow.
- Note that a dry filter is freeze-safe. Sawyer says a filter that has never been wetted is safe from freezing. After the first wetting, that protection is gone for good — so do the first flush at the start of the trip, not in October before a cold snap.
- Label the sides. Mark the dirty cap and the clean cap. Everything downstream of the filter must stay downstream of the filter.
- Put the plunger somewhere you will actually carry it. A Squeeze without its backflush plunger is a filter with a countdown on it.
The field routine
- Pick the cleanest water you can reach. Flowing over gravel beats still and silty. Every gram of sediment you avoid is flow you keep. If the only source is murky, let a bottle stand for ten minutes and decant the top.
- Fill the dirty side. Scoop with the pouch or a cut-down bottle, or submerge the bottle mouth-down and tip it upright under the surface to fill it fast.
- Screw the filter on, dirty side down. Finger tight. Over-tightening deforms the gasket and that is where leaks come from.
- Squeeze gently and steadily. Steady pressure flows better than hard squeezes, and hard squeezing is what splits pouches at the seams. If it will not flow with moderate pressure, it needs backflushing, not more force.
- Keep the clean side dry. Do not dunk the output cap, do not hold it with the hand that just scooped from the creek, and do not put the clean bottle down in the mud with its mouth open. This is how most people get sick with a perfectly good filter.
- Blow it clear before you pack it. Blow back through the clean side to clear most of the water out, and stow the filter in a zip bag so it does not wet the rest of your kit.
Backflushing properly
At home, after a trip, backflush once more and let the filter dry fully before storage. Sawyer's help centre is the authority on its own cleaning procedures, and it is worth reading once properly rather than relying on trail hearsay.
Gravity, inline and bottle setups
The Squeeze is three products depending on how you rig it, and the kit includes the parts for all three.
- Squeeze (default). Pouch or bottle, filter, squeeze. Fastest for one person filling one bottle. Nothing to set up.
- Gravity. Hang a full dirty bag high, run the included tubing down through the filter into your clean container, and walk away. This is the right answer for a group or for filling several liters at camp, and it is the setup that makes a slow filter tolerable.
- Inline. Fit the hydration adapters between a reservoir and its bite valve, fill the bladder dirty, and drink filtered as you walk. Convenient, but you then have an untreated reservoir inside your pack, so keep that hose and bladder separate from anything you drink from directly.
- Bottle-threaded. Screw the filter onto a 28 mm plastic bottle and drink through it. The lightest workflow of all, and the reason disposable bottles are the unofficial standard container of American thru-hiking.
A note on flow: Sawyer publishes no flow rate for the Squeeze. Its help pages do rank its own filters against each other — the full Squeeze flows faster than the Micro, which flows faster than the Mini — which is the comparison that matters if you are choosing between them.
Which Sawyer you have
The routine above is the same for all three Sawyer filters, but the flow and the backflushing frequency are not. Here is what each one is and who it suits.
Our picks for this
The three Sawyer filters, and the routine for each
Same 0.1 micron membrane, same backflush procedure, different flow. Weights are filter-only, as Sawyer lists them.
Best all-around squeeze filter
Sawyer Squeeze (SP129)
85 g (3.0 oz)$25–$50 band6.9 / 10The full-size filter: fastest flow of the three and the longest gap between backflushes. The default for camp duty and for filling several liters.
$45.95Amazon#ad · Price as of November 3, 2026 · Affiliate disclosure for the link to Sawyer Squeeze (SP129)
Best compact squeeze filter
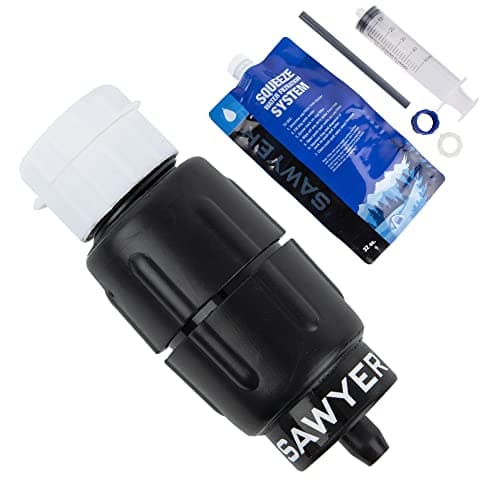
Sawyer Micro Squeeze (SP2129)
57 g (2.0 oz)$25–$50 band7.6 / 10Half the length at about 2 oz, with flow Sawyer ranks between the Mini and the Squeeze. Backflush it more often than the full Squeeze.
$33.95Amazon#ad · Price as of November 3, 2026 · Affiliate disclosure for the link to Sawyer Micro Squeeze (SP2129)
Best budget backup filter
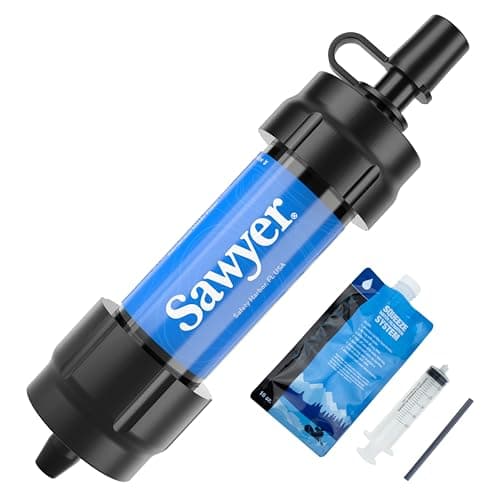
Sawyer Mini (SP128)
57 g (2.0 oz)$25–$50 band7.8 / 10The smallest and slowest. Excellent as a backup or a day-hike filter; frustrating as your only filter on a long trip, because it needs backflushing constantly.
$28.99Amazon#ad · Price as of November 3, 2026 · Affiliate disclosure for the link to Sawyer Mini (SP128)
Photos are illustrative, not the product. Scores are spec-derived.
If you are choosing between them rather than maintaining one you own, the full comparison is in Squeeze vs Mini vs Micro.
Freezing: the one rule that matters
Sawyer's position is explicit and it is the single most important thing to know about this filter. There is no warranty for a frozen filter. Its 0.1 micron filters are rated for 32-140°F. A filter that has never been wetted is safe from freezing. And a filter you suspect has frozen after first use should be replaced.
The reason is physical: water trapped in the hollow fibers expands as it freezes and splits them. A split filter looks identical, flows normally or even faster, and no longer filters. There is no test on a Squeeze that will tell you.
Mistakes that wreck flow
- Squeezing harder instead of backflushing. Pressure splits pouches and gaskets. Slow flow is a cleaning signal, not a strength test.
- Filtering silty water without settling it first. Ten minutes of standing time saves hours of squeezing over a trip.
- Leaving it to dry out hard between trips with sediment inside. Backflush at the end of a trip, not only at the start of the next one.
- Cross-contaminating the clean side. A working filter cannot protect you from a dirty output cap.
- Treating viruses as covered. Sawyer makes no virus claim for the Squeeze. If viruses are in scope, you need a purifier or a chemical step — see best backpacking water purifiers.
- Assuming a lifetime warranty means a lifetime filter. It covers defects, not freezing and not neglect.
Looked after, a Squeeze is one of the few pieces of backpacking kit you genuinely buy once. The whole routine is ten seconds of care per fill and two minutes of backflushing a week. For broader guidance on treating backcountry water, the CDC's page for hikers and campers is a good non-commercial reference.
If you have not bought a filter yet, or you are not sure the Squeeze is the right format for your trips, how to choose a backpacking water filter covers that decision first.
How we scored this
How these picks were chosen
Every weight and list price here comes straight from the maker's own product page, measured against a named mainstream reference, then turned into one number: grams saved per dollar. Every figure links to the page it came from, so you can check any of it in a click.
Value and weight are computed from those published numbers; function, durability and ease are scored from the specs, manuals and standards each maker publishes. Commissions never set a score or decide a pick. The formula, weights and references are published.
What changed
- Published.
Questions
Frequently asked
How do you use a Sawyer Squeeze?
How often should I backflush a Sawyer Squeeze?
What happens if a Sawyer Squeeze freezes?
Can you drink directly from a Sawyer Squeeze?
Does the Sawyer Squeeze remove viruses?
How long does a Sawyer Squeeze last?
Receipts
Sources
- Sawyer: Squeeze Water Filter System product page and kit contents (checked 2026-09-22)
- Sawyer help centre: Squeeze Water Filter, size and freezing guidance (checked 2026-09-22)
- Sawyer help centre: Filtration, temperature range and relative flow (checked 2026-09-22)
- Sawyer: Micro Squeeze product page, rated life and kit (checked 2026-09-22)
- Sawyer: Mini Water Filtration System product page (checked 2026-09-22)
- CDC: Water Treatment Options when Hiking, Camping or Traveling (checked 2026-10-11)
Weights, list prices and specs on this page come from each maker's own pages, linked on every product, and performance figures such as boil times or flow rates are the maker's claims, labeled that way, so you always know whose number you're reading. Amazon sets its own prices and changes them often, so buy buttons link to the live listing. Read the full method.